Class 6 - Time and Audio
Play homework

Topics
- Working with audio: pitch and tracker modes
- working with time
- Gravity and Platformer physics
Description
In this week we cover sound, the time function and building simple physics. This will come together in the creationof a simple physics platformer. We’ll follow this up with time critiquing the alpha version of our first game project and concrete ways to improve our games.
Class Notes
Working with audio
A video game is arguably incomplete until sound is added. Adding the element of sound can help contribute to a feeling of immersion within the world of the game, and often provides direct feedback on game events (start, jumping, a collision, winning, etc).
The Pico-8 sound editor is made up of two parts, the Pitch Editor and the Tracker Editor modes. They are two different ways to create and edit and arrange sounds, and can be used for simple sound effects or to make background music.
Sound Editor
Pitch Editor
The Pitch Editor is one way to create and edit sounds, the default mode when you click on the PLAY button of Pico-8’s menu bar.
The top left is the number of the sound effect. You can specify which sound to play by its number.
SPD is the speed. How fast the sound will be played. Click and change this number or click and drag right or left. A small number plays very fast. A long number plays very slow.
Draw the sound with your mouse. You can experiment by clicking on different instruments and drawing with them. The instruments appear on the top right and have different lines to represent them. These instruments come from electronic synthesizers. They are “triangle wave”, “tilted saw”, “saw wave”, “square wave”, “pulse wave”, “organ”, “noise” and “phaser” instruments. But it’s okay if you don’t what this references. Try clicking some instruments and drawing sound in the window. You can draw higher and the pitch will be higher. You can draw lower and the pitch will be lower.
Underneath the drawn music sounds is the Volume. You can control how loud or soft individual parts of the played sounds are. To erase a section of music, drag the volume to 0 and the related music notes above will disappear.
Press the space bar to try playing the sound.
Try dragging the speed to the right and left and experiment with playing it at different speeds.
Notice that for sound effects, we usually want a fast speed, and for music we usually want a slower speed.
Tracker Editor
![]()
A music tracker is a common way historically to arrange music in electronic software, particularly for making music for games. It originated in 1987 with the Amiga home computer system and its Ultimate Soundtracker software.
A music tracker (sometimes referred to as a tracker for short) is a type of music sequencer software for creating music. The music is represented as discrete musical notes positioned in several channels at chronological positions on a vertical timeline. A music tracker’s user interface is traditionally number based. Notes, parameter changes, effects and other commands are entered with the keyboard into a grid of fixed time slots as codes consisting of letters, numbers and hexadecimal digits. Separate patterns have independent timelines; a complete song consists of a master list of repeated patterns.
If we switch to the tracker mode button (next to the top left button. Looks like a grid) we have the tracker editor view. It is an alternate way to edit our sound, and has some additional features here: sound effects like reverb and detuning.
Using sound effects
Using a sound effect is incredibly easy. We use the sfx command and specify the note number.
sfx(n)
Working with Time
What is Super Mario without the moment near the end of the level where the music speeds up and you have limited time to get to the end of the level before the timer runs out? Or the short period after you catch a star where you’re invincible?
In a fighting game, there is a timer that governs the length of a match. In a racing game, you can only accelerate for a limited time period. In a sports game a timer onscreen counts down the seconds left on a shot clock.
For all of these kinds of games and many more, we need to be able to work with time. Almost all video games have some need to be able to track a length of time. The standard way we do this in Pico-8, and many other game frameworks, is through the use of one simple tool: time(), which also has the alternate name t().
time() returns the total number of seconds since the program was launched. All timers and use of time in a game must be built out of this simple function.
--basic timer example
function _init()
  time_to_wait=3
end

function _update()
  if time() > time_to_wait then
    sfx(0) --play sound effect
    print("it's been 3 seconds!")
  end
end
Try running this program and you’ll notice that it continuously prints out “it’s been 3 seconds!” once 3 seconds have elapsed.
What if we wanted something to happen a single time EVERY three seconds, repeating?
We can add 3 more seconds to the timer at the moment the timer goes off.
--continous timer, every 3 seconds
function _init()
  time_to_wait=3
end

function _update()
  if time() > time_to_wait then
    sfx(0)
    print("it's been "..time_to_wait.." seconds!")
    time_to_wait+=3 --add 3 more seconds at this moment
  end
end
Try running this updated version of the program. Now you will see that it prints out ONCE exactly every 3 seconds, along with the total time that has elapsed since our program was begun. This works because we are continuously running _update() and checking to see if the total time since our program started is greater than the time_to_wait variable. If it is, we print out text, then add more time to the time_to_wait variable and begin running update again afterwards.
With very little change to our code we can go from a regular interval to a random interval. For example, perhaps we want a monster to change its position every random number of seconds between 0 and 8.
time_to_wait+=rnd(8)
If we wanted to specify a minumum and max time keep in mind that in Pico-8 by default we must add a number to our random to specify a minimum value.
time_to_wait=rnd(5)+3 --wait between 3 - 8 seconds
Gravity
So far, our biggest need for calculation has been specifying coordinates and determining overlap. Another common use comes in many games: the need for gravity and possibly other forces (acceleration, etc). This comes up most often in platformer genre games. Think of the need to jump from one platform to another.
To use gravity in a game, we must first have mastered the idea of game states. We covered this previously when looking at a basic game loop.
Game states recap
Rather than cram all of our game program logic into just the _update() and _draw() functions we make custom functions that we call from those two. Then we store a state variable which holds the name of whatever the current state of the game is. And finally we switch between the needed custom functions depending on the current game state.
Example:
function _init()
  state="start"
end

function _draw()
  if state=="start" then
    start_screen()
  elseif state=="dead" then
    lose_screen()
  else
    game_screen()
  end
end
--not shown: the custom functions for each scene referenced above
Programming note: This concept is related to an over-arching idea of the finite state machine. Our game can only be in one state at a time. There is a way to transition between states. For example, by losing all one’s lives you would immediately change from the “play” state to the “dead” state.
Now we add physics
To add physics to a game, we need x, y position as well as the xspeed and yspeed. This is needed for example when we have a ball bounce around the screen (see Pong). Previously, we had a ball bounce when it reached the edge of a screen. Now, to make a ball appear to virtually bounce like a rubber bouncing ball we need to decide the location for an invisible wall. If the ball goes past that point, we reverse its speed in that direction, and we decrease the speed a litle bit to make it appear as if gravity is affecting it.
Platformer Physics, Part 1
This week we begin building a very basic platformer, utilizing the map with tiles.
We start by creating several tiles: a player, a basic platform square, and optionally a background color square.
Once these are drawn, we switch to map mode to draw our custom level with our sprites tiled. Only add the background and platform sprites, as our player location will be controlled through another means.
Create a player with x, y. We also create basic gravity, which we’ll define here as pulling the player down at the rate of 1.
function _init()
  p={
    x=20,
    y=20
  }
  gravity=1
end

function _update()
  p.y+=gravity
end

function _draw()
  cls(0)
  map()
  spr(2,p.x,p.y) --2 is our player sprite #
end
The map we drew in the map editor can be drawn to the screen with the map command. It assumes drawing the map from the top left tile unless otherwise specified.
The player starts and immediately begins to fall. Neither the platform nor the bottom of the screen break his fall.
Now we need to add to our _update() function.
First we add player control with key presses.
if btn(⬅️) then
    p.x-=1
  end
  if btn(➡️) then
    p.x+=1
  end
Then we apply gravity as long as the player is not standing on a platform. We do this by checking the title under the player, using the mget() command, which gets the sprite number of a location on the map.
Our player x and y coordinates are between 0 and 128. But our tile sprites are drawn with tile numbers. Our standard game screen of 128x128 pixels is technically 16 tiles by 16 tiles, and each tile is 8 by 8 pixels. To see if a player is standing on a tile sprite we need to divide the x and y coordinates of the player by 8.
--divide by 8 to get the tile position
if mget(p.x/8,p.y/8)~=1 then --if not on sprite 1
  --then apply gravity
  p.y+=gravity
end
Try running this code. The player does stop, but only when standing immediately overlapping the platform. We want the player to stop above the platform.
if mget(p.x/8,(p.y+7)/8)~=1 then
  p.y+=gravity --apply gravity
end
If you test this, you’ll see it is not quite that accurate at the end of a platform. We can add a dot in the corner of the player sprite to see the true x,y, location of that tile, as judged via our program.
In the coming weeks we will refine this code.
Game testing and feedback
Code homework
For homework this week you will finish your survival/escape arcade game.
Complete a revised version of the game with all characters in the scene. The game should incorporate collisions and animation states for all characters. There must be a background scene. The graphics should be consistent.
The game should have sound, a start screen, and be a compelling unique game. Consider what elements are needed in the scene. Playtest to make sure the game is fun. How will your ramp up difficulty as the game proceeds?
Requirements:
- a complete game you can win/lose (or just try to get a high score)
- fully working code
- A title/start screen. Press button to play.
- When you lose, the player presses a button to play again.
- A unique design and gameplay mechanics
- sound effects
Credits
- Pitch Editor and Tracker Editors gifs by Jan Krutisch CC BY 4.0
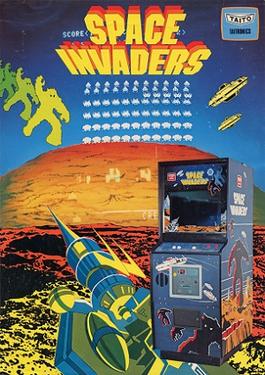
- Space Invaders poster from Taito to show visual elements of the game, 1978
- The Binding of Isaac screenshot, 2011