Class 2 - Variables and Functions
Play homework
- Jelpi and other Pico-8 demos plus Splore games


Topics
- More fun (?) with variables
- Functions
- Pico-8 desktop
- Program structure
-
Player input keypresses
Description
This week we install Pico-8 desktop version and began to create a working game. We’ll understand the basics of a ‘game loop’, draw shapes on the screen and take player input.
Class notes
Variables, continued
So far we have mostly used integers: whole numbers.
For numbers with decimals we use a dot. These are called ‘floats’.
a = 10.4
b = 2.63
c = 0.1
pi = 3.141592
To round a number, we have several options:
flr() -- rounds down
ceil() --rounds up
Note: there is no round() function. But we could make one. This will come in the next section on functions!
Take a look at the following code:
X = 5
Y = 3
Z = X + Y
First we say X = 5. When we give a variable a value, we call that an assignment. We assign 5 to X, and 3 to Y. Next we assign X + Y to Z. So now Z equals 8. Remember that you can always check the value of a variable with print. If we were to change the value of X or Y after Z = X + Y, it would not affect Z. It would still be 8.
X = 5
Y = 3
Z = X + Y
X = 2
Y = 40
print(Z)
--Output: 8
This is because to the computer Z is not X + Y, it’s simply 8.
__
Variable naming rules
There are a few rules when naming a variable. First of all, your variable may have a number in it, but not at the start.
test8 --Good
te8st --Good
8test --Bad, error!
Your variable name also can’t include any special characters like @#$%^&*.
And finally, your variable name can’t be a keyword. A keyword is a word that the programming language uses. Here’s a list of keywords in Lua:
and       break     do        else      elseif
end       false     for       function  if
in        local     nil       not       or
repeat    return    then      true      until     while
You also don’t want to name a variable the same word as a Pico-8 command. For example, it’s a bad idea to make a variable called spr since that’s how you draw a sprite.
Usage
Variables can be used to keep track of things. For example, we can have the variable coins, and every time we pick up a coin we can do coins = coins + 1.
___
Summary
Variables are words in which we can store a value like a number or text. You can name them whatever you want, with a few exceptions. Variables are case-sensitive.
Functions
With functions, we can store pieces of code. This allows us to execute this code whenever we want. It also lets us organize our code into logical parts.
Usage
Often you want to execute certain code in multiple locations. Instead of copying that code each time you want to use it, we can simply add a function call. And if we want to change the behaviour of this function, we only need to change it in one location, which is the function itself. This way we avoid repeating code. Don’t repeat yourself, it’s one of the most important programming principles.
function example()
  print("Hello World!")
end
You start by writing the keyword function, followed by the name of the function. A function is a type of variable, so the same rules apply as when you name a variable. This function’s name is example. After the name we put parentheses (). Now we can start typing the code we want to put inside our function. In this case, we put in print("Hello World!") When you’re done you close the function with an end.
Note that when you run the code, you’ll see no “Hello World!” in your console, this is because we still have to execute the function. We execute a function like this:
example()
--Output: "Hello World!"
You simply type the function’s name, followed by parentheses. This is what we call a function-call.
Parameters
Take a look at this code:
function sayNumber(num)
	print("I like the number " .. num)
end

sayNumber(15)
sayNumber(2)
sayNumber(44)
sayNumber(100)
print(num)
--Output:
--"I like the number 15"
--"I like the number 2"
--"I like the number 44"
--"I like the number 100"
--nil
Inside the parentheses of the function we can put what we call parameters. Parameters are temporary variables that only exist inside the function. In this case we place the parameter num. And now we can use num like any other variable.
We execute our function multiple times, each time with a different number. And thus each time we print the same sentence, but with a different number. The number we put inside the parentheses is what we call an argument. So in the first function-call, we pass the argument 15 to the parameter num.
At the end of our code we print num, outside of our function. This gives us nil. This means that num has no value. It’s not a number, or string, or function. It’s nothing. Because like I said before, parameters are variables that are only available inside the function.
Return
Functions can return a value, which we can store inside a variable, for example. You can return a value by using the return keyword.
function giveMeFive()
	return 5
end

a = giveMeFive()
print(a)
--Output: 5
a becomes the value that giveMeFive returns.
Another example:
-- Multiple parameters and arguments are separated by a comma
function sum(a, b)
	return a + b
end

print(sum(200, 95))
--Output:
--295
Our function sum returns the sum of a and b. We don’t necessarily need to put the value our function returns in a variable first. We can directly print the value.
Back to rounding a number
In our variable section, I mentioned there is no built-in rounding function. There is only the built-in flr() and ceil() functions. So let’s make our own rounding function:
function round(a)
  return flr(a+0.5)
end

--now we can call it
print(round(32.3)) --32
print(round(87.8632)) --88
Summary
Functions can store code that we can execute at any time. We call a function by writing its name followed by parentheses. We can put values inside these parentheses. These values are passed to the function’s parameters, which are temporary variables that only exist within the function. Functions can also return a value. Functions remove repetition and that is a good thing.
Note: Global/local variables in Lua versus other programming languages
A global variable can be used anywhere in your program. A local variable is only present with that value in its current scope where it was created. If you create a local variable inside a function, that variable cannot be used inside another function with the same scope.
If you know another language previously, you may be aware of the difference between local and global variables. By default, variables that are created in Lua including those created inside a function have global scope. To create a specifically local variable you must declare the variable with the word local.
x = 60 --global variable x is 60 in all other functions/locations
local x = 30 --local variable x = 30 in the current scope only
Intro to Pico-8
PICO-8 is available for purchase as an app for Windows, Mac OS X, Linux (Intel), and Raspberry Pi. It also came bundled with the PocketC.H.I.P. portable computer, and works on many other handheld retro game handheld devices (such as Anbernic) and on Raspberry Pi computers. See the PICO-8 website for purchasing information.
PICO-8 intends to capture the fun and creativity of writing programs for the small personal computers of the 1980’s, without the hassles of an arcane platform. The specifications are purposefully limited so that making games is easy and fun. The console has built-in tools for creating graphics, sound, music, and code, all of which run within the console’s 128-by-128 pixel screen. You program PICO-8 using the Lua programming language.
Games are saved as cartridges (or “carts”), which are just small files that can be shared over the Internet. You can publish a cartridge to the PICO-8 forum, where anyone can play it directly in a web browser without the PICO-8 app, discuss it, and download it to examine it in the app’s tools. Publishing a cart also makes it accessible from within the app’s Splore cartridge explorer.
You can also export cartridges with a standalone player that can be embedded into any web page, suitable for commercial publication on game networks such as itch.io.
PICO-8 has an active developer community, with hundreds of games, tools, and resources for learning how to make games.
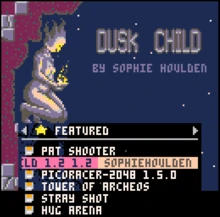
Splore
Splore is a graphical interface for exploring PICO-8 cartridges. You can use Splore to browse, search, and play cartridges published to the forum (BBS) directly over the Internet. You can also use Splore to navigate the Cartridge Storage area, with or without an Internet connection.
To activate Splore, run the splore command (or its abbreviation, s) from the PICO-8 command prompt.
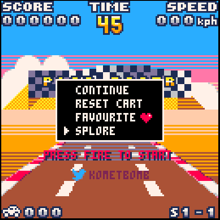
Select a cartridge to run it. To return to Splore from the running cart, press the Esc key to pause the cart and display the Pause menu, then select Splore.
To return to the command prompt, press Esc from within the Splore interface.
Saving carts locally
When you select a published cartridge, PICO-8 downloads the cart, loads it into memory, and runs it. The cart is stored on your computer in a cache separate from the cartridge storage area.
To save the cart to the storage area:
While the cart is running, press Esc to pause the cart. Select Splore to return to the browse interface. Press Esc again to exit Splore and return to the command prompt. Use the save command to save the cart.
As usual, you can press Esc from the prompt to examine the contents of the cart.
Examples
> splore

> s
Pico-8 specifications
- Display
- 128 x 128 pixel resolution
- 16 colors
- Sound
- 4 channels
- 8 waveforms
- Controls
- two 6-button controllers (up, down, left, right, x, o) available from a PC keyboard
- connect up to eight 6-button controllers via SDL
- Cartridge size
- 32 kilobytes per cartridge
- 128 x 128 pixel sprite sheet
- 128 x 32 tile map
- 64 sound patterns, 64 music patterns
- Lua code space limited by characters and tokens
- Memory
- addressable memory regions for graphics, sound, and general use
- separate RAM for the Lua call stack
- 64 values (256 bytes) persistent memory per cart
- Raspberry Pi GPIO pins mapped to memory
Getting Started
The easiest way to start playing games is to visit the PICO-8 forum in a web browser. All cartridges published to the forum can be played in a web browser without the PICO-8 app.
From the PICO-8 app or a network-connected device (such as PocketC.H.I.P.), you can use the built-in Splore utility to browse and play all carts published to the forum. Type splore at the PICO-8 prompt and hit enter.

PICO-8 includes a small set of demonstration carts built in. To access these carts, you must first run the install_demos command at the PICO-8 prompt. This creates a demos/ folder in the PICO-8 file system with carts that can be loaded, run, and edited.
You can download carts from the forum by clicking on the “Cartridge” link and saving the file. The file is a .p8.png file and appears as an image of a cartridge in a web browser. Use the folder command to open the PICO-8 file system location in your operating system’s file browser, then move the file to that location to make it accessible to PICO-8.
When you execute folder in your PICO-8 prompt, your operating system’s file browser opens a window showing the files and folders in the cartridge storage area. You can copy files in and out of this area to make them available to PICO-8.
To save a cartridge discovered within Splore, load and run the cart, hit Escape to open the pause menu, select Splore, then hit Escape again to return to the PICO-8 prompt. The loaded cart is still in memory. Use the save command to save it as a local file.

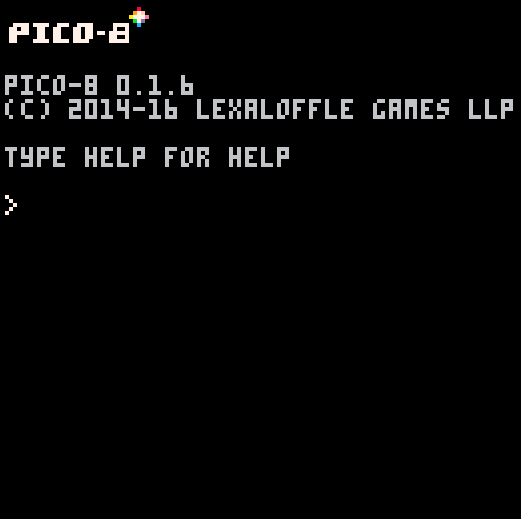
Pico-8 command prompt
The PICO-8 command prompt lets you interact with PICO-8 and the currently loaded cartridge using typed commands. By default, the command prompt is the first thing you see when starting PICO-8.
You use the command prompt to load and save cartridges, manage PICO-8 files, organize them into folders (“directories”), and perform other actions such as starting [[Splore]].
> install_demos
> load demos/jelpi
> run
For a list of available commands, see [[CommandReference]].
You can type Lua statements (such as print()) at the prompt to execute them. This is a good way to experiment with the PICO-8 APIReference and try Lua.
Note: The PICO-8 prompt only accepts commands and statements. To see the value of an expression, you must use the print() statement.
Getting back to the command prompt
When playing a cartridge, you can interrupt it and return to the command prompt by pressing the Esc key. You can enter Lua statements at the prompt to examine or change the program’s global variables. In many cases, you can use the resume command to continue the program.
If you started the cartridge from Splore, pressing Escape opens the Splore pause menu. To get to the command prompt from here, select Splore from this menu, then press Escape again.
At the command prompt, pressing Esc opens the cartridge editor interface. To return to the command prompt from here, press Esc again.
The command prompt is exclusive to the PICO-8 app, and is not available from the PICO-8 web player.
Debugging: Frame Advance
Typing a period, “.”, and hitting enter will advance your program one frame by calling _update() and then _draw(). This can be useful to test behavior from frame to frame.
Links
Program structure
The way we structure our software in Pico-8 is based around 3 main functions. The function _init() happens once, at the start of the game. The function _update happens continuously. By default, it is 30 times a second. All code that we need to constantly run should go in here. An example, this is where we’d check continuously for a player’s button presses, to see if the player should move around the screen, for example. This is immediately followed by the function _draw(), which, as you can probably guess, is where all drawing related functions should go. This is where we’ll draw the player, enemies, terrain, the background, and anything else.
So: _init() -> _update() -> _draw() -> _update() -> _draw() -> _update() -> _draw(), etc
Behind the scenes, Pico-8 calls these functions, and we create them, and fill them with code. This is what we call a callback.
Here’s what that looks like, with some typical and basic commands inserted.
x,y=40,52 --starting position for player
score=0

function _init()
end

function _update()
  --buttons
  if btnp(0) then
    x=x-10
  end
  if btnp(1) then
   x=x+10
  end
end

function _draw()
  cls(0) --reset screen black
  spr(1,x,y) --draw player to screen at x,y
  print(score,120,0,8)
end
Summary
LÖVE is a tool that makes it easier for us to make games. LÖVE uses a programming language called Lua. Everything starting with love. is part of the LÖVE framework. The wiki tells us everything we need to know about how to use LÖVE.
Player Input with if statements and keypresses
With if-statements, we can allow pieces of code to only be executed when a condition is met.
You create an if-statement like this:
if condition then
	-- code
end
A condition, or statement, is something that’s either true or false.
For example: 5 > 9
The > means, higher than. So the statement is that 5 is higher than 9, which is false.
If we want to check if a value is equal to another value, we need to use 2 equal-signs (==).
For example: 4 == 7
1 equal-sign is for assigning, 2 equal-signs is for comparing.
x = 10 --Assign 10 to x
x == 10 --Compare 10 to x
We can also use >= and <= to check if values are higher or equal to each other or if the values are lower and equal to each other.
10 <= 10 --true, 10 equals to 10
15 >= 4 --true, 15 is higher than 4
So the code above is a shorthand for
10 == 10 or 10 < 10
15 == 4 or 15 > 4
Boolean
A variable can also be true or false. This type of variable is what we call a boolean.
Let’s make a new variable called move, with the value true, and check if move is true in our if-statement.
function _init()
  x = 10
  move = true
end

function _update()
  -- Remember, 2 equal signs!
  if move == true then
    x = x + 10
  end
end
move is true, so our rectangle moves. But move == true is actually redundant. We’re checking if it’s true that the value of move is true. Simply using move as a statement is good enough.
if move then
  x = x + 10
end
If we want to check if move is false, we can put a not in front of it.
if not move then
  --only runs if move is set to false
  x = x + 10
end
If we want to check if a number is NOT equal to another number, we use a tilde (~).
if 4 ~= 5 then
  x = x + 10
end
We can also assign true or false to a variable with a statement.
For example: move = 6 > 3.
If we check if move is true, and then change move to false inside the if-statement, it’s not as if we jump out of the if-statement. All the code below will still be executed.
if move then
  move = false
  print("This will still be executed!")
  x = x + 10
end
Arrow keys
Let’s make sprite 1 move based on if we hold down the right arrowkey. For this we use the function btn to check continuously or btnp to check if a button was pressed and released.
if btnp(0) then
  x = x + 10
end
Instead of button “0” we can also use the right arrow to represent the right button. Press Shift+R. To get left, Shift+L. To get down press Shift+D. To get up press Shift+U.

We can also use else to tell our game what to do when the condition is false. Let’s make our rectangle move to the left, when we don’t press right.
if btn(0) then
  x = x + 10
else
  x = x - 10
end
Notice my use of spacing (2 spaces to move to the right) to help me make my code easier to read.
We can also check if another statement is true, after the first is false, with elseif. Let’s make it so that after checking if the right arrowkey is down, and it’s not, we’ll check if the left arrowkey is down.
if btn(0) then
  x = x + 10
elseif btn(1) then
  x = x - 10
end
Try to make the sprite move up and down as well.
and & or
With and we can check if multiple statements are true.
if 5 < 9 and 14 > 7 then
	print("Both statements are true")
end
With or, the if-statement will execute if any of the statements is true.
if 20 < 9 or 14 > 7 or 5 == 10 then
	print("One of these statements is true")
end
Summary
With if-statements, we can allow pieces of code to only be executed when a condition is met. We can check if a number is higher, lower or equal to another number/value. A variable can be true or false. This type of variable is what we call a boolean. We can use else to tell our game what to execute when the statement was false, or elseif to do another check.
Code homework
Part 1: Explore Pico-8
- Acquire Pico-8
- Load all demo games
- Navigate Splore and try out games
- Investigate their code
- Add at least 3 “favorite games” in the splore
- Make a copy of Jelpi and try editing the code and running it. Make some changes. Use the API to lookup commands. Save your code under another program name.
Part 2: Build out a small scene for a charater to explore
For coding homework this week, you can add onto the assignment you began last week with a character and terrain, or build something completely new.
For homework, you will be creating an experimental video game character and making it interactive.
- You may want to start by sketching your character on physical paper.
- Then switch to Pico-8 and begin drawing it in the sprite editor. Anywhere that there should be “background” behind the character should be the color black.
- Create multiple terrain sprites. These could be dirt, grass, mountains, trash, or anything else. You may want to play with sprite size and scale. Notice the w and h optional parameters for drawing a sprite.
- For your code, be sure to have your _init(), _update() and _draw() functions. Put code into its proper section.
- Draw your terrain sprites to the screen. Make a compelling scene for the player to explore.
- Draw your player sprite to the season. Add in detection of button presses to move the character around.
- OPTIONAL: Add at least one item to the game.
- OPTIONAL: When the player is near or on the item and presses O or X button, have them pick up the item and carry it around.
Credits
- Adventure, by Atari. Programmed by Warren Robinette.
- Image of Adventure (1980)
- Image of Tennis for Two (1958)
- Copyright (c) 2022 Sheepolution
- Pico-8 by Lexaloffle
- Pico-8 Wiki CC BY-SA