Class 5 - Animation
Play homework
Topics
- Animation
- Pongs review
- How “good”/”scary” is AI?
- Arrays of objects
- Workshop: Frogger-like game
- Building a “chase” or action game
Description
So far our sprites have been static, flat images that float around in the screen. This week we’ll add animation to make our game more dynamic.
Class Notes
Animation
Frames
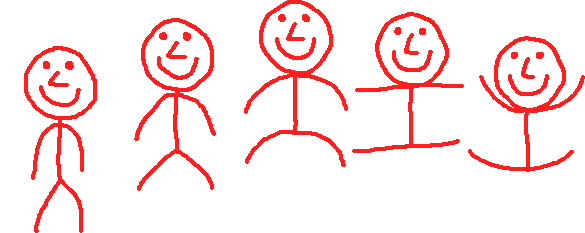
Let’s make an animated image. Consider how animation was traditionally made for the screen. It started as a movie strip, with each separate part of the strip consisting of an individual drawing, slightly changed from the previous and next drawing in the strip. Watching the screen as the next strip flicks by gives the appearance of an animation.
And so it is in our games.
We will create a separate sprite for each “frame” of animation. Our process in Pico-8 will be to have a variable hold the number of the current sprite, and to advance the number of the current frame to move through the animation.
Consider an animation consisting of 5 frames for example. We will need 5 sprite images.

function _init()
  spritenum=1
end

function _update()
  --animation
  spritenum+=1 --same as writing spritenum=spritenum+1
  if spritenum>5 then
    --this will reset back to frame 1
    spritenum=1
  end
end

function _draw()
  spr(spritenum,64,64)
end
Note: we do not have to start at 1. Imagine our first sprite number is 28. We could initialize spritenum at 28 and if spritenum is greater than 32 then reset spritenum back to 28.
Look at him go!

Animation speed
If you want to slow down your animation then you can advance the sprite number slower, or faster if you want the animation to be faster.
spritenum+=0.5 --half as slow as before
How does this work even without changing anything else in our code?
function _draw()
  spr(spritenum,64,64)
end
The answer is that in Pico-8 it takes the first argument in the spr() function if it’s a float (decimal) and rounds down to the nearest lower whole number (integer).
spr(1.5,64,64) --rounds down to sprite 1
There is no sprite 1.5 but Pico-8 would round down to 1 and display sprite 1.
So for example, if we are changing at the speed spritenum+=0.3 then:
spr(spritenum,64,64) --spritenum=1 the first time this runs
spr(spritenum,64,64) --1.3 => rounded down to 1 the next time
spr(spritenum,64,64) --1.6 => rounded down to 1 the next time
spr(spritenum,64,64) --1.9 => rounded down to 1 the next time
spr(spritenum,64,64) --2.2 => rounded down to 2 the next time
spr(spritenum,64,64) --2.5 => rounded down to 2 the next time
spr(spritenum,64,64) --2.8 => rounded down to 2 the next time
--etc...
Pongs Review
David Berreby: How good/scary is ChatGPT?
A conversation with science writer David Berreby about AI, writing, and the creative process
Wednesday, September 25th, 4:00pm, Natural Sciences Lecture Hall, room 1001
Humans have long had tools that help us create (the musician’s metronome, the writer’s spell checker). But now we’ve been abruptly asked to adjust to artificial intelligence (AI) tools that claim to do the creating for us. Two years ago, it was new text from ChatGPT and other “Large Language Models.” Today, the same machine-learning technology also generates spoken words, images, videos, musical composition, scientific hypotheses, scholarly analyses, and more. At times AI’s results are deeply flawed or flimsy. But at other times these systems manage to mimic human efforts astonishingly well. How should we reckon with them? As one scholar who studies AI has said, “If you haven’t had an existential crisis about this tool then you haven’t used it very much yet.”
David Berreby is a science writer who has written about AI for the past decade. In this conversation, we’ll look at various AI tools for creative tasks and discuss the practical, psychological and moral ramifications of using them. The talk will be hands-on, rooted in examples from Berreby’s own experience as well as from real-time use in the room. The aim is to get a better understanding of how AI is affecting writers, students, scholars and other creators, and take an informed look at the kinds of decisions AI asks us to make. Participants should emerge with a better sense of whether and how and when they can use AI – and when they shouldn’t.
The NSS lecture series is made possible in part by generous contributions from Con Edison.
Multiple Enemies: Using tables to make arrays of objects
The time has come for us to produce a large number of characters, enemies or other “things” in a game. We will do this by using a table to create an array. Anything in our software that we have multiple of, each with their own individually assigned attributes we call an object.
Imagine we create an enemy and give it some attributes:
enemy1={x=rnd(126),y=rnd(126),w=8,h=8,spritenum=2}
If we want a second enemy, we do almost the exact same thing again:
enemy2={x=rnd(126),y=rnd(126),w=8,h=8,spritenum=2}
For a third enemy, again:
enemy3={x=rnd(126),y=rnd(126),w=8,h=8,spritenum=2}
So far, we have this:
enemies1={x=rnd(126),y=rnd(126),w=8,h=8,spritenum=2}
enemies2={x=rnd(126),y=rnd(126),w=8,h=8,spritenum=2}
enemies3={x=rnd(126),y=rnd(126),w=8,h=8,spritenum=2}
Now imagine we actually needed 20 enemies. Or 200. It would be tedious to hand write this all out, over and over, only changing the number of the enemy.
Rather than do that, we can take advantage of two things: we can use a for-loop to do something many times. And we can use a table to hold many of the same kind of object.
enemies={}
for i=1,10 do
  enemies[i]={x=rnd(126),y=rnd(126),w=8,h=8,spritenum=2}
end
This will declare and initialize a table named enemies. Then we use a for-loop to fill it up. We are essentially creating a x, y, w, h and spritenum for each enemy. If we didn’t use a for-loop, we’d have to individually create all of them by hand:
enemies[1]={x=rnd(126),y=rnd(126),w=8,h=8,spritenum=2}
enemies[2]={x=rnd(126),y=rnd(126),w=8,h=8,spritenum=2}
enemies[3]={x=rnd(126),y=rnd(126),w=8,h=8,spritenum=2}
--etc, up to enemies[10]
Now we will make a game with a large number of enemies of a type. We also need a table for our player’s attributes.
function _init()
  p={x=64,y=120,w=8,h=8,spritenum=1}
  enemy={}
  for i=1,10 do
    enemy[i]={
    x=rnd(126),
    y=rnd(114), --not all the way down
    w=8,
    h=8,
    xspeed=1,
    spritenum=2
    }
  end
end
This has declared an initalized 1 player and 10 enemies.
In our update, we can advance our enemies to the right, and have them wrap around the screen.
  for i=1,#enemy do
    enemy[i].x=enemy[i].x+enemy[i].xspeed

    if enemy[i].x>126 then
      enemy[i].x=0
    end
  end
And we can draw them to the screen:
function _draw()
cls(0)

  for i=1,#enemy do --operate on every enemy
    spr(enemy[i].spritenum,enemy[i].x,enemy[i].y)

  --check if each enemy has collided with player
    if collide(p,enemy[i]) then
      --if so, play sound
      sfx(0)
    end

  end

  spr(p.spritenum,p.x,p.y) --draw the player

end
Code homework
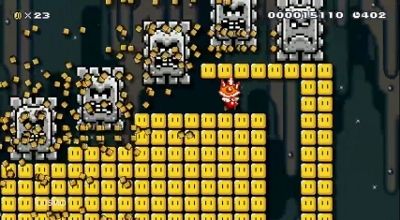
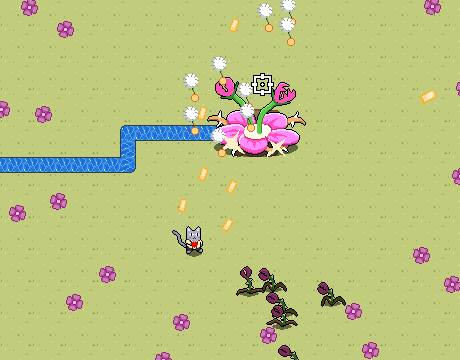
For homework this week you will begin to design a survival or action arcade game. This can be of several different types such as stealth games, escape, “bullet hell”, Dalek attack, shoot ‘em up (e.g. Space Invaders), Frogger, or fight game, etc. See our Play Homework for an example.
- Review our notes from class on animations
- You may want to review previous class notes on tables and objects
- Sketch out in your notebook your characters and scene
- What is the goal? What does a level look like? What animation states are needed?
- Design (digitally or on paper) the protagonist and add them into your game. There should be at least 2 animation states. For example: walking, standing, jumping, running. Code one of these states with a functioning animation.
- The game should have a score, lives, obstacles/enemies.
- Code the game with working code. Make sure to include a score, lose-state, and anything else needed. Code should be clean and organized and easy to follow, with comments and functions.
Credits
- Image Copyright (c) 2022 Sheepolution
- Mario Maker screenshot low resolution image to represent the game intended as ‘fair use’

