This is a post about Git (as well as GitHub), what it is, and why you may want to use it. It’s oriented to artists especially and those who are beginners or new to Git. In addition, for those already familiar with git, I’ll explain a basic commandline workflow and in an Advanced Idiocy section at the end I’ll present a very simple alias that lets you push your work to GitHub ultrafast and sloppily.
I’m an artist, educator, programmer. I work in new media and digital art. I create websites, games, generative digital art, audio and more. I teach at a university, and volunteer as an organizer with the organization and artspace Babycastles, among many other roles and activities.
Just a warning, this is a misfits guide in the sense that I’m ignoring proper use case for professional programmers in favor of the folk uses that are part of a simplified or custom repertoire. If you’re a professional developer, look elsewhere.
What’s Git for and why would I use it?
Saving moments in time
Most descriptions of git and GitHub are jargon-y, and oriented to professional programmers. Here I’ll use my own informal descriptions and dispense with anything I consider to be extraneous to our basic use here. Just like Photoshop contains menus with dozens of options and sub-menus, git has a head-spinning number of options. But let’s stick just to the basics of what we need.
Git is a piece of software for saving your work. Specifically, it lets you step back and forth through time to see your work at different moments in time. If you deleted a file from your project 2 weeks ago or 2 months ago and need it again you can jump back to that timeperiod and grab the file and revive it.
Collaboration and Sharing
Git is also often used for collaboration. Specifically, many people use the online commercial website GitHub as a central hub as another location holding copies of all of their Git projects. With this method, everyone has their own copy of the Git project, makes their own changes, and then merges their work with a centralized GitHub version of the project. In this method, GitHub serves as a more complex version of something like Google Docs where you have a folder holding a number of inter-related files all being edited at different times by many people.
What are you saving?
Git is used to save code as well as any file that can be saved as text. You can save lists, data, programs, text files, blog posts, drawings, even image files.
The implications of this are that you don’t need to be a programmer to benefit from using Git and GitHub. Perhaps you want to save text files like notes, create your own personal wiki, store your grant application files, or create lists of instructions. You can use Git to save these over time. And with GitHub you can save an online copy accessible even if your own computer dies. You can share your work with a wider audience, make to-do lists, and you can even host your work as a (free) website.
Who uses Git and GitHub?
In a word: programmers. They use it to track their project’s code over time.
But who else? Writers, game designers, governments, scientists, and more, such as artists and museums.
What’s the difference between Git, GitHub (and others)
Git is local software you run on your own computer. It’s the software you use to store and save your project at different moments in time. GitHub is a commercial website that exists as a cloud-based server. You can use it to store a copy of any of the projects you track with Git on your own computer. This can be just a backup, or it’s common to include a README file that explains what your project is, and potentially how to use it or collaborate.
If your computer ever died, you could get a new computer and then download all of the projects you’ve stored on GitHub, and not only would you have a copy of the project, you’d have its full history at each step along the way. GitHub provides other functionality as stated earlier, like tools for collaboration, hosting a website, making lists. GitHub is now owned by Microsoft and has questionable practices. It has a number of competitors that use the same basic infrastructure. Their main competitor is GitLab, which also has free signups and unlimited projects and project website hosting as well as some different commercial and professional tools for managing your projects. And it also has questionable politics. I personally use a combination of Git with GitHub for public projects as well as Keybase Git for storing my own personal wiki.
Examples of Git/GitHub by Artists and Organizations
MOMA has a github repository called collection that contains data of all of the artists and artwork in their permanent collection. It is kept up to date, with a current 139,003 records of art objects. The information is stored as json, a data file format meant to be human-readable but also parseable by software.
From this GitHub project computational poet Allison Parrish created a Twitter bot modernart_exe that randomly generates meta-dada. In other words, it uses the metadata from MOMA’s collection repository (things like titles, medium, dates…) and generates new descriptions of fake artworks several times a day.
BANNERS OF THE PRESIDENTENSTUDIO, MELNIKOVA, VELIMIR KHLEBNIKOV, NO. 10
— ModernArt.exe (@modernart_exe) March 16, 2020
1987
3 plates, poster with artist's standard mailing form
Researchers have used the data to produce data visualizations of the collection as well as other research.
Artist, professor and programmer Jeffrey Thompson has created a GitHub project called Repo-As-Artwork. All projects in Git (and GitHub) are called Repositories or Repos for short. Thompson’s project is a simple list file that links to other art projects stored in GitHub repos. These include:
Mimi Onouha’s On Missing Data Sets
My term for the blank spots that exist in spaces that are otherwise data-saturated. My interest in them stems from the observation that within many spaces where large amounts of data are collected, there are often empty spaces where no data live. Unsurprisingly, this lack of data typically correlates with issues affecting those who are most vulnerable in that context. *–On Missing Data Sets.
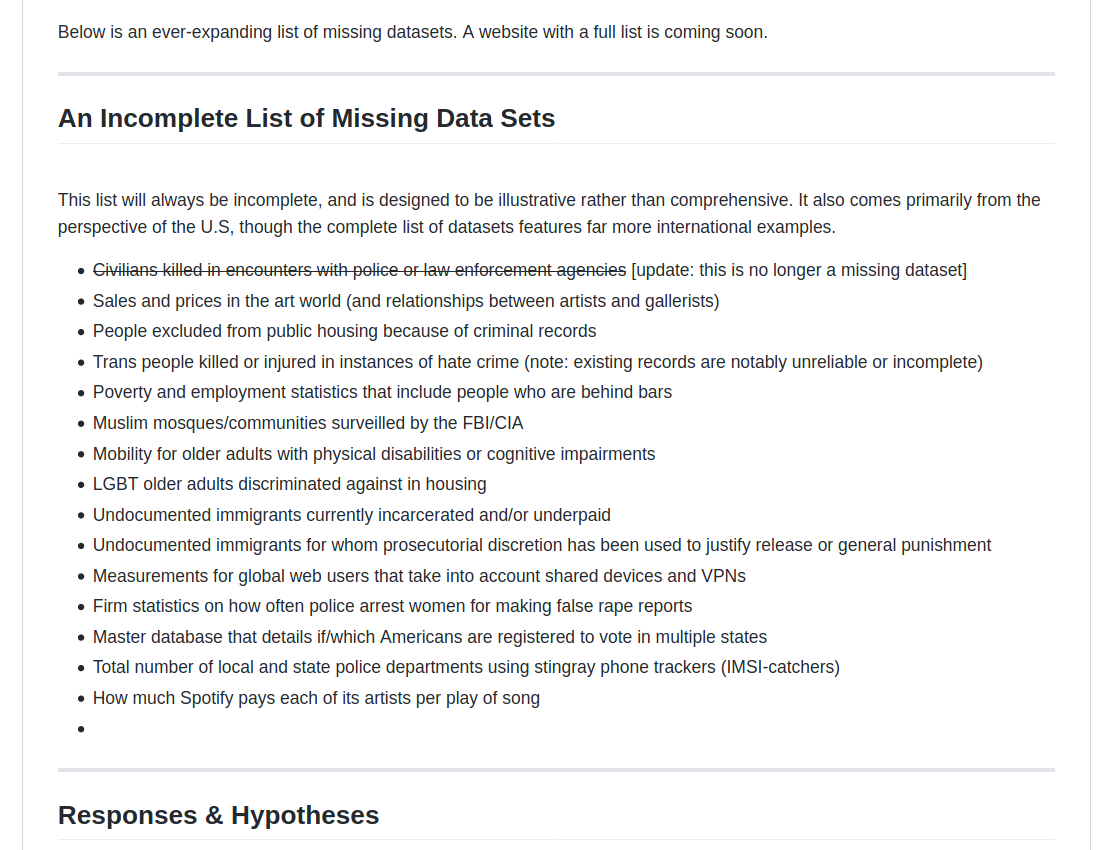
Mimi Onouha - On Missing Data Sets
Owen Mundy’s After Douglas Davis is:
A “fork” of an early net.art piece, “The World’s First Collaborative Sentence,” by Douglas Davis
Mundy describes how the Whitney’s curators had “placed small sections of garbled ASCII text from [a] project on Github with the hope that others would “fork” the data and repair the original [project].”
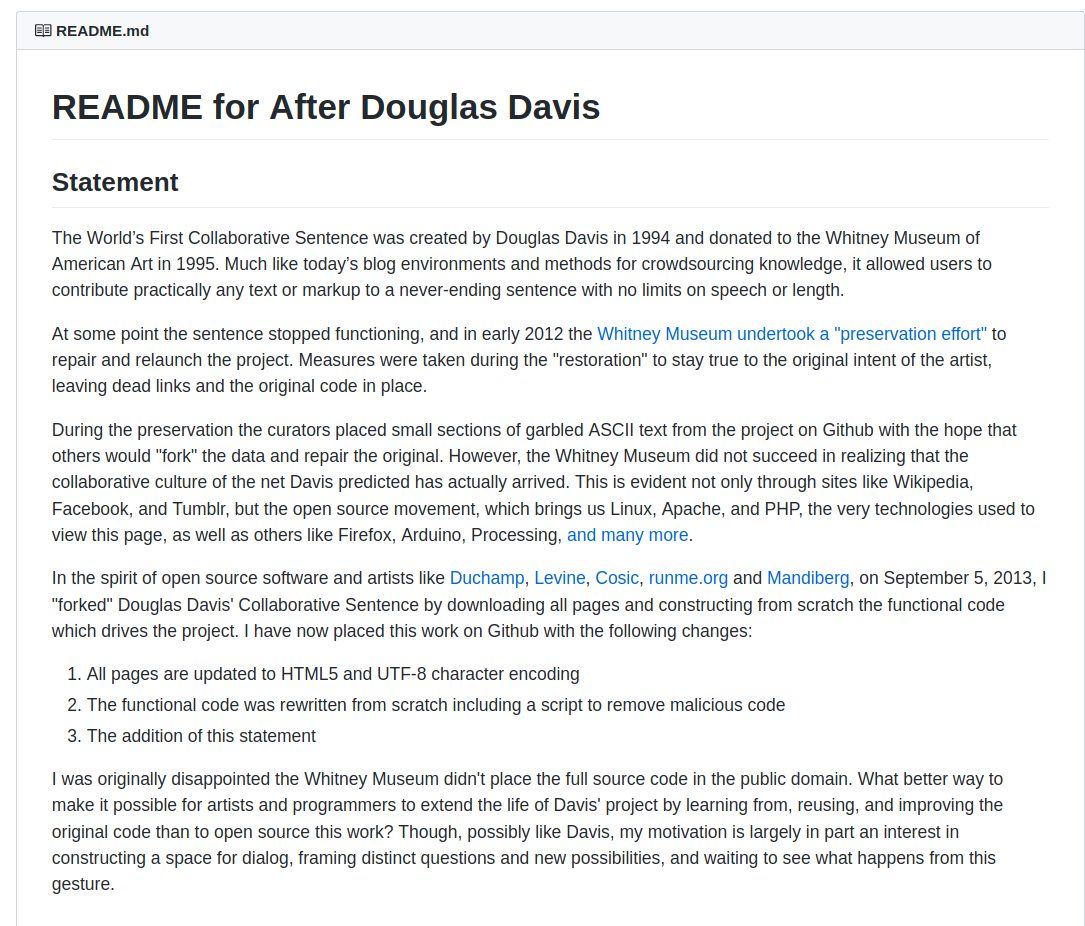
Owen Mundy - After Douglas Davis
Jeff Thompson’s own project Pebble Dataset is:
…a machine learning dataset consisting of 5000 images of pebbles gathered in Cambridge, England in the fall of 2018. Pebbles are literally cast-offs from something else, not the stone of buildings or triumphal sculptures but the thing left behind in the mud by scraping glaciers and on the beach by rolling waves and collecting along roadside ditches. A dataset of pebbles is a poetic addition to the overwhelmingly ultilitarian datasets that already exist.
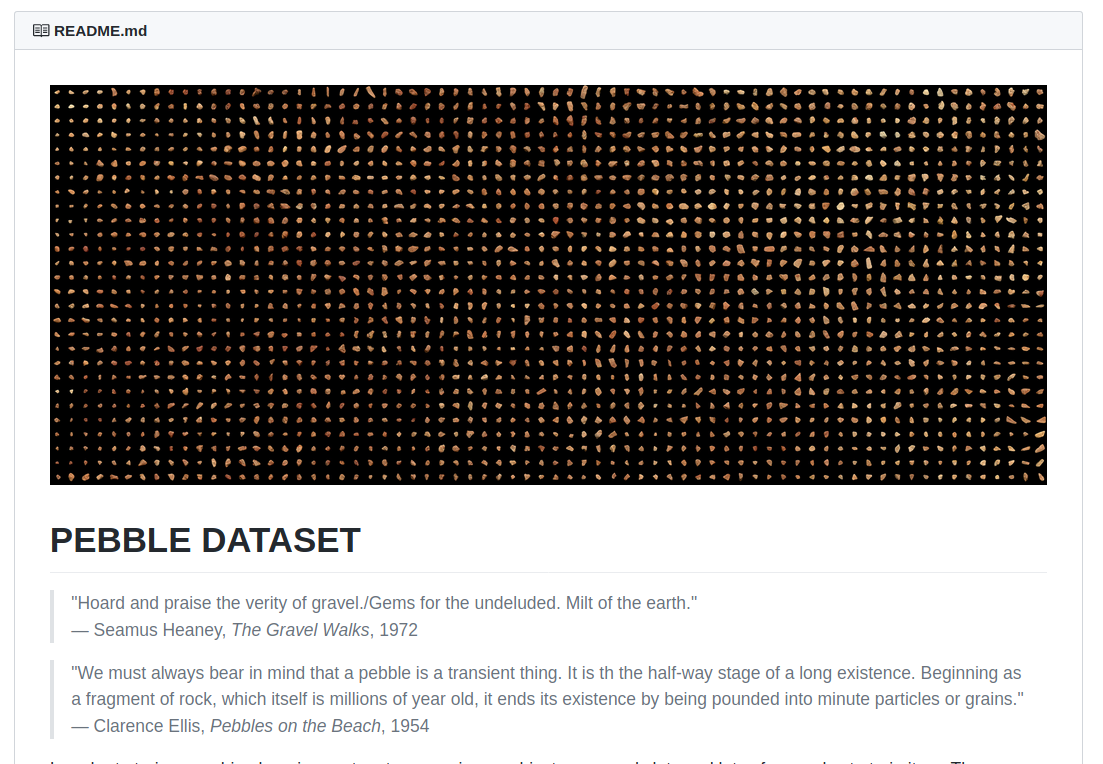
Jeffrey Thompson - Pebble Dataset
Still many media artists and educators use GitHub as a place to park and share syllabi, writing and notes. Taeyoon Choi from the School For Poetic Computation taught a course called the Artist’s Toolkit in the Spring of 2018, placing his syllabi and some notes online. I created a repository for my Special Projects in Tiny Computing class and then used GitHub to publish it as a webpage complete with syllabi and weekly class notes.
For all of these above text-based description files I’ve linked to, the project pages are described in a file format called Markdown, which is a simple plain text file with a few characters inserted to indicate the title, headlines, links, images and lists. It is optional to do this, but it makes your writing easily readable on GitHub.
The easiest way to use Git/GitHub - via the web
Okay, at this point you may have a sense of what you’d use Git and GitHub for. Now it remains to be seen how to use it.
Before I do that, let me just say again that these are my own shared folk methods for beginners.
Using GitHub
creating a new repository
Start by creating (and/or logging in) to a new free account on GitHub. Note that you can also use GitLab instead, but the interface will be slightly different.
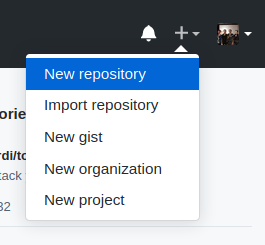
In the top right click on the plus button and click New Repository.
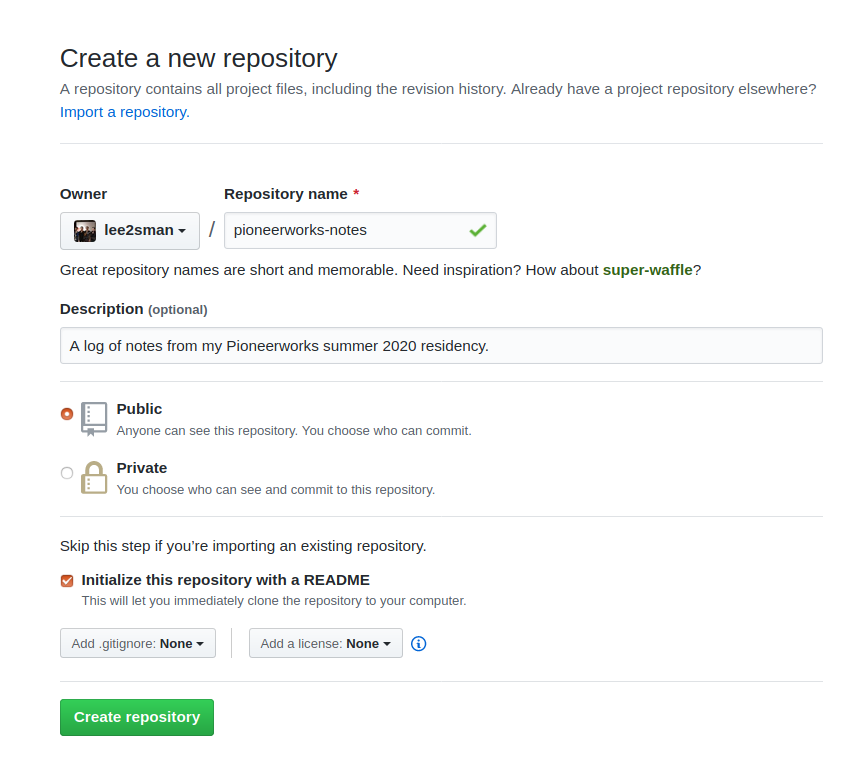
Now enter a repository name. Write in an (optional) description below. If this should be publicly-viewable click Public. If you want it private, click Private so that only you can see it when you log in, click Private. Make sure to click on the checkbox next to Initialize this repository with a README. Ignore those other dropdown menus below and click Create Repository.
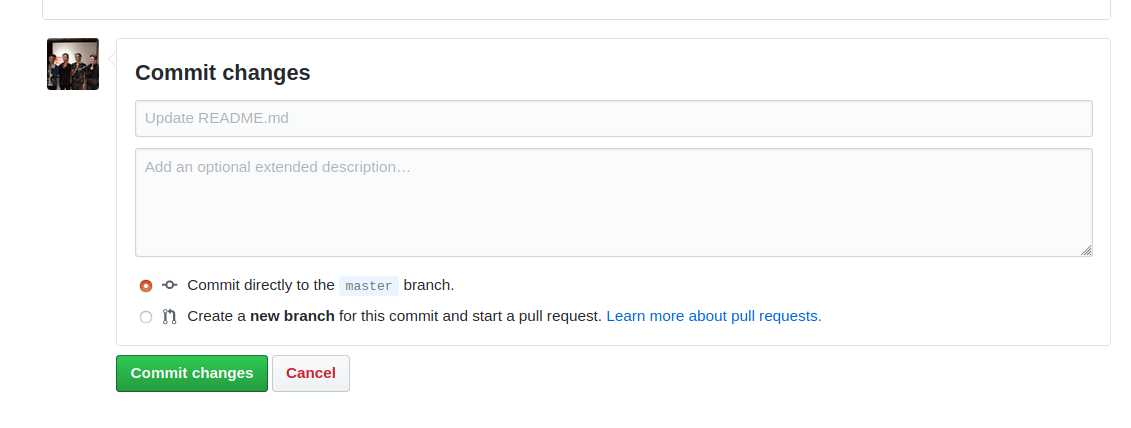
In a moment you’ll see your new repository and you’ll be looking at your starter README file. You can start by editing this file. Click on the pencil icon on the right. You can type in plain text (and add any markdown characters if you want to add links, bold, headlines, or create a list for example). When you’re finished editing, scroll down and click on the big green Commit changes button.
Adding files to a repository
Let’s say you want to upload some images or add some other files from your computer (text, a bio, a list, anything). Click on the name of the repository (a link) at the top of the page. It will bring you back to the main page. From here you can click Create New File to start a new text file, or Upload files to upload any files.
Let’s start by clicking Create New File. In the top, it will ask you to enter a name. If you want the page to be readable online here, you can give it a name like names.md if you want to have it be readable as markdown text, or you can give it a name like some-text.txt to have just a simple text file. In any case, you can start writing text in this file. When you’re done, scroll down and click and the big green Commit new file button.
After clicking to commit you’ll be brought back to the main page.
If you want to upload some files click on the Upload files button. You can then drag and drop your files into this window. When they’ve uploaded, scroll down and click on the big green Commit changes button.
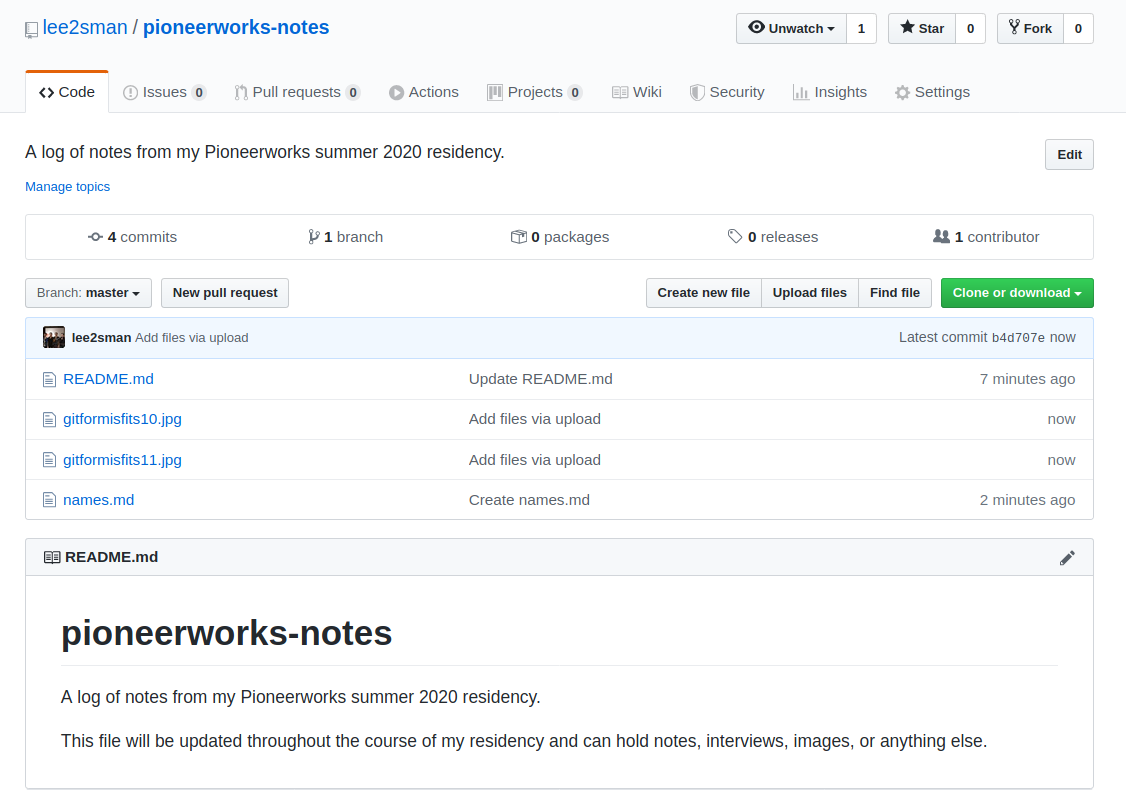
It will take you back to your home page for that project, and you’ll see all of your files listed there.
Turning your repository into a website
Ok, let’s say you’ve written a good description or added the text you want. You may have even added more files to this repository. And now you want this to live as a basic website.
Click on the Settings button in the top right of your repository’s page. Scroll down to the section labeled GitHub Pages and click on the Source Dropdown menu and change it to Master Branch.
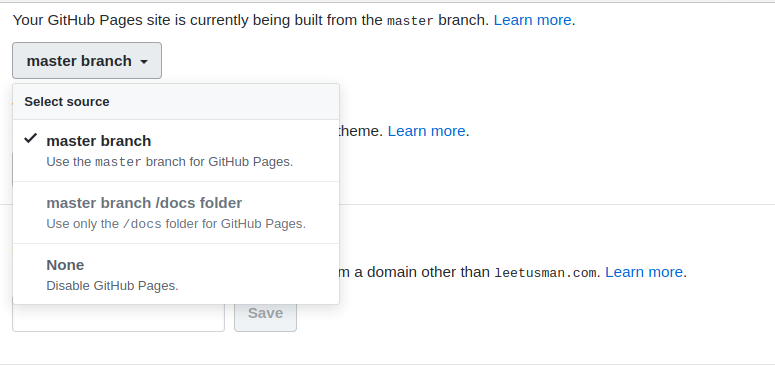
Your page will immediately reset and you will be taken back to the top of the page. I don’t know why GitHub coded it this way. Anyway…scroll down back to the GitHub Pages section. It will say something like Your site is published at https://lee2sman.github.io/pioneerworks-notes/. It takes about 30 seconds up to a minute (if you don’t wait long enough you’ll see a 404 error page) for a server to spin up and create that page. Once it does, you can click on the link there and go to your new website. On that page you’ll see your project’s README file. If you know how to code for the web and your project’s repository has an index.html file, it will show that file instead. Congratulations, you have a website up.
Advanced Workflow
Maybe you’ve just skipped down here because you’re an advanced misfit. Warning to beginners: this does not follow from the previous section!
This section is for those who are comfortable with the command line but are lazy.
Basic Normal Git and GitHub workflow
I usually start a new repository on my computer for a project. I’ll start by putting in notes, maybe some code or images, or an index.html file. Once I have these files in here, if I’m intending on some public facing project I’ll add a simple README.md file describing the project.
Or at the very least, just the project’s title.
echo "# Project Title

A short description of my project">>README.md
Note that in the command line you can start a multi-line text by starting with a double or single quote, then hitting return at the end of each line, and ending your lines of text with another double (or single) quote. I redirect this text into a new or pre-existing README.md file.
Start Tracking Files with Git
git init
git add *
git commit -m "Initial commit"
This initalizes the folder so that it becomes tracked as a git repostitory. Then we add all (that’s what the * means) files to be tracked. Then we commit all of them to memory, saved at that specific moment in time.
We’re now tracking our files locally with Git.
Connect and Push your file onto GitHub
Go to GitHub.com and make a new project repository on there or navigate to your pre-existing one. If you’re making a new repository make sure you give it a new name and skip the step asking you to initialize with a repo since we’ll be importing our own local files from our computer. Click to create the new repo.
It should then give you the needed commands there, but here it is as well. Go back to your commandline inside your repo folder and enter
git remote add origin https://github.com/yourGitHubName/yourGitHubRepoName.git
git push -u origin master
Make sure to replace your GitHub username and the repo name with your own.
Normal Workflow
Going forward, you’ll continue to edit and add files in your repository. Each time you add a new file or edit a file you need to save, then add the file(s), then commit the file(s), then push the files. And you’ll do this again and again.
git add file1ThatWasChanged.txt file2.md images/image1.jpg
git commit -m "added example image and description"
git push
When you push, the git commandline will prompt you for your name and password on GitHub.
If you mess up as you’re typing something just press Control and C to exit out and start the line again. A common error is to not put the proper syntax for your commit line with its -m and quotes. Sometimes it might even throw you into Vim, which is my favorite text editor but maybe not yours. If this happens press Escape and then type :q! and then hit enter.
Misfits Trick
I keep my own wiki with hundreds of text files in it. I’m pretty active with it, and alter many pages most days. I love saving this over time, and want to have copies both on my own computer as well as my Keybase Git. But I don’t want to individually have to add, commit and then push every time I edit my files.
I added my own special shortcut that does all at once simply by typing git update.
How does it work?
I edited my ~/.gitconfig file and added the following to the end of my file:
[alias]
  update = ! git add . && git commit -m "autocommit"
  && git push
So now I have a new alias git update that I can use. It adds everything in my current folder, commits it all with the automated message autocommit and then pushes my local up to my GitHub repository.
And that’s my introduction, beginner guide to using Git/GitHub on the web, a simple commandline workflow, and a misfit trick for ultrafast committing. For advanced or specialized GitHub knowledge, tricks or anything else, look almost anywhere else! Freecodecamp for example has an article titled Learn The Basics of Git in Under 10 Minutes.
Best of luck.